Showing posts with label iPhone. Show all posts

Wednesday, 1 November 2017

Ginza District of Tokyo - A Photo Story


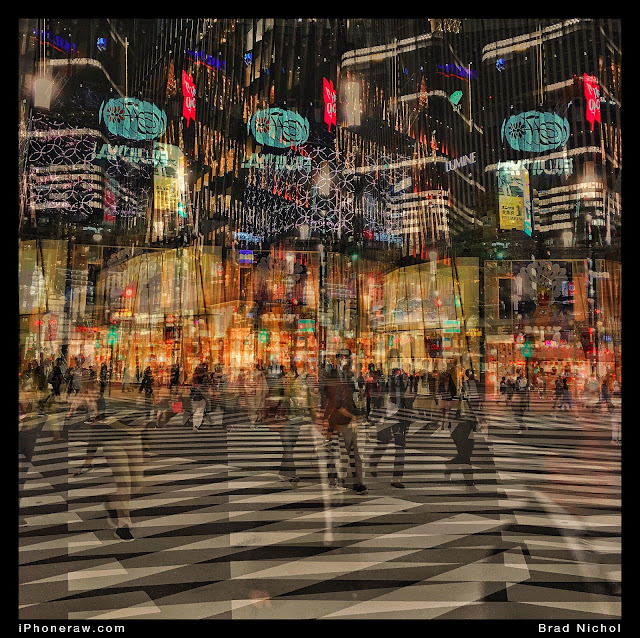
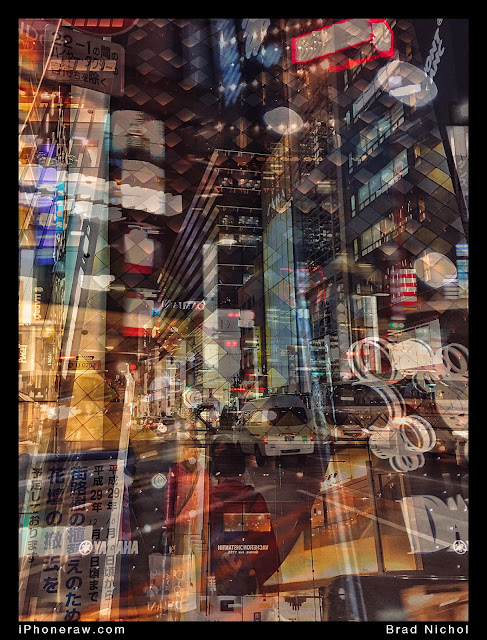
Multiple exposure, taken on iPhone, Ginza, Japan
Ginza Neon Composite, iPhone using Average Cam Pro


As on all holidays, I take both my iPhone and my Olympus M4/3 camera kit, the Oly gets a workout on the more serious stuff, especially where I need more telephoto reach or subject separation and the iPhone goes with me everywhere else.

I thought some of my readers might be interested in seeing a little photo story of the Ginza district and immediate surrounds in Tokyo captured whilst my wife and I wandered the shiny streets.

Ginza itself is 87 hectares of high end, over the top, consumerist worshipping retail nirvana for Japanese with money to burn and a need to proclaim their superior status. The Ginza area provides a fascinating insight into the culture of modern Japan and presents photographers with a literal feast of options, both for the tummy and the lens. Beyond Ginza lie an array of fabulous parklands and probably most importantly the Imperial Palace grounds.


Modern Stainless Steel and Glass in Ginza, main street Ginza at night.
                
                                              Stainless steel, glass and acrylic Ginza style.


My wife and I along with my Son Aaron and his partner Jain spent 6 days in Tokyo recently, staying in a hotel in Ginza.  https://www.gardenhotels.co.jp/eng/millennium-tokyo/ .  The lodgings were superb and ideally located for access to the Ginza district, subway system and within easy walking of great eateries where you can exercise your gastronomic muscles.
https://www.gardenhotels.co.jp/eng/millennium-tokyo/ .


Halloween shop in Ginza Japan at Night with full display on footpath 

Halloween is huge in Tokyo and is relatively new to the country.

Like many high-end shopping precincts around the world, Ginza is dripping with the usual brands, except perhaps the presentation is little more excessive than usual. Considering that Ginza is home to some of the worlds most expensive retail real estate in "dollars per meter squared terms", that excessiveness becomes all the more impressive, especially when you compare retail space sizes to the small residential spaces of Japanese units and homes.

Ah Ginza, it's all "be-on-neon, sidewalk fashion parade and busy with a purpose".  But, my friends, in case you are thinking it would be like, say Times Square or some similar location in other parts of the western world be assured that Ginza has a flavour that's entirely different and in many ways uniquely Japanese, which is what makes it so fascinating.


Multi Story clothing store street display main street Ginza Japan
  
Window displays are not done by half measures.


First the familiar, Ginza is devoted to the church of conspicuous consumption and the brands of choice are the same as almost everywhere else, Cartier, Hermes, Prada, Gucci and all the other usual suspects. Most of the shoppers are women, and indeed most of the stores are aimed at women, and of course, there are a lot of very nicely dressed people parading under the bright evening lights.
As always the store window displays are works of art but not dissimilar to the same store displays found in other locations around the world, just as you would expect in these days of corporate uniformity and branding.


Main Street Ginza Japan in the Typhoon, lady under umbrella, no traffic

Typhoon season in Japan means rain and lots of it. My wife Wendy takes shelter under the standard Japanese clear umbrella.  Many of the streets are clear of cars on Sundays, this is the main drag, Chuo-dori.


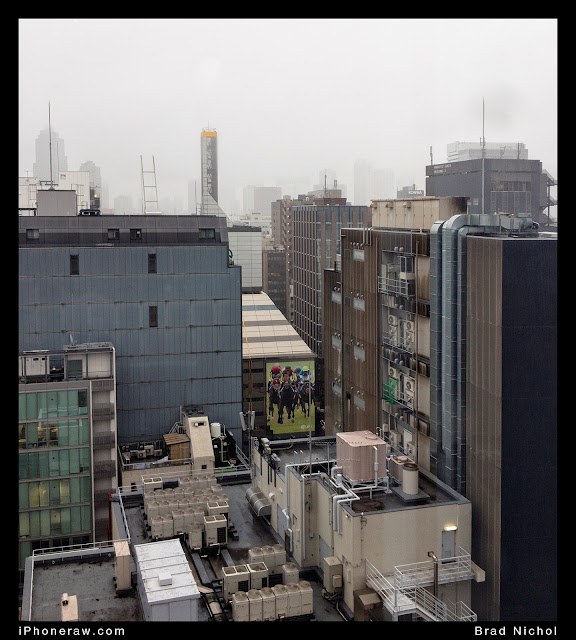
Ginza from 9th floor in Typhoon with rain showing tops of buildings and foggy sky.

Bleak day from the 9th floor of G.Itoya stationary store.


Ginza Laneway Japan with teeming rain and lady with umbrella during typhoon.
        
                        Rain sodden laneway in Ginza, neon lights are everywhere.


The whole Ginza edifice is built on the concept of consumption rather than materialism, the joy is in the shopping, browsing, touching, and ultimately parading the high-end bags along the streets post-purchase. You can take it as a given that younger Japanese are keen shoppers and love the idea of having the latest gadget, fashion or items of consumer desire.

Of course, most non-food purchases in the Ginza area fall into the category of a "declaration of status" rather than fulfilling any real need for body covering, personal hygiene or practical necessities, such needs would generally be met elsewhere in Tokyo. You don't go to Ginza to buy soap, well you might, so long as it was luxuriously scented, exquisitely packed and being sold at a premium, then popped into a flash labelled bag.


Gucci window display in Ginza, Japan, 4 people in a line with store in background.

Gucci window display on Harumi-dori


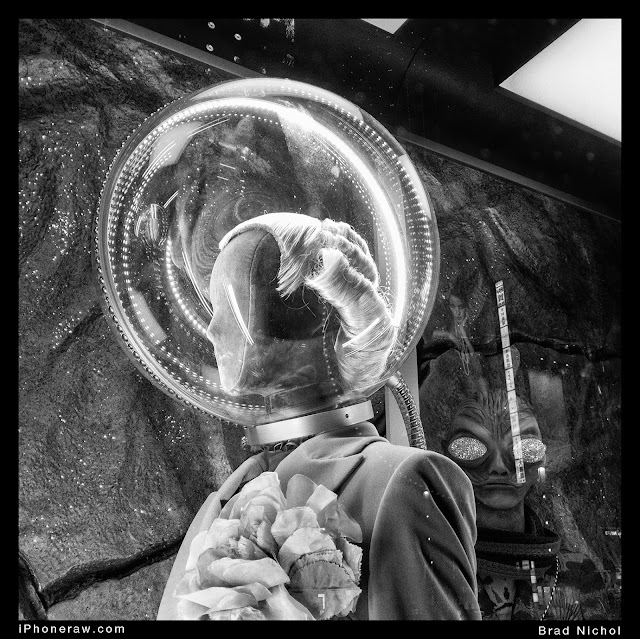
Window display in Ginza, with aliens, monochrome, alien in glass bubble.

The Aliens have arrived in time for Halloween, another high end fashion store on Harumi-dori.


I read an interesting article yesterday on the issue of consumerism and materialism, it's well worth a look if you have the time and probably typifies the drive behind Ginza more than anywhere else in the world except perhaps Dubai.
https://www.theguardian.com/business/2017/oct/30/to-cure-affluenza-we-have-to-be-satisfied-with-the-stuff-we-already-own


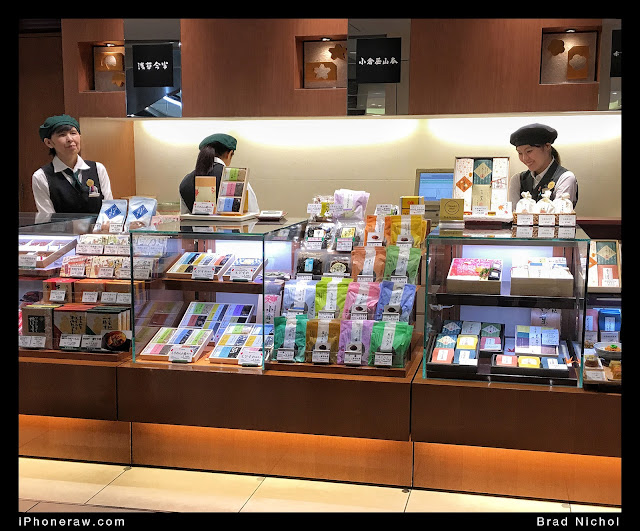
Tea shop in Japanese department store with 3 staff, high end packaging.
    
                                 Tea shop in a department store, incredible packaging.


But now for something completely different, Ginza is also home to some incredible Japanese department stores that sell brands and foods which are uniquely Japanese, examples being Mitsukoshi, Matsuya and Wako. You may not wish to buy anything at all but I promise a walk through the food halls alone will leave the average westerner agog at the quality and presentation of the foods and even more impressed at the vast range on offer.

Beyond the department stores, you have speciality shops that are also uniquely Japanese, such as G.Itoya stationary store and Hakuhinkan toy store (or more accurately toy emporium).


Paper floor at g.Itoya stationary store in Ginza, Japan.
       
                                  G.Itoya has a whole floor devoted to paper alone.  


It is possible to explore Ginza at a subterranean level moving from shop to department store etc via the subway paths, very handy in Typhoons and many folk choose this option to avoid traffic and crossings.

Move out onto the streets, and you'll notice several other aspects.  First,  there are relatively few high-end European cars, the vast majority of vehicles are taxis, and almost all of them are black old-school Toyota Crowns that seem ideally suited to their purpose and are always immaculately clean.  In fact, all vehicles in Tokyo including commercial trucks seem to be fresh from the carwash, which is quite profound when you make comparisons to most cities around the world.

The link below will give you some insight into the Tokyo taxis.
http://autoweek.com/article/car-life/unsung-taxi-heroes-tokyo-toyota-crown-sedan-and-crown-comfort.


Modified Lexus LS430 in main street Ginza, with air bag suspension on three wheels.
                   
                                    Lexus LS 430, modded and bagged on Ginza.  

Private passenger vehicles in Ginza tend to by high-end Toyotas and Lexuses, there are few other brands on display, maybe the occasional high-end Nissan, but frankly, I think about half the worlds fleet of Lexus HL600s must reside in Ginza alone.

The most unique Japanese vehicles you'll see in Ginza are the Toyota Century sedans which is Japans most prestigious vehicle and is almost always chauffeur driven.  The conservative but exquisitely built Century is the vehicle of choice for CEOs, Government Officials and the very wealthy, it's the ultimate Japanese automotive statement.

Oddly a Century with the Chauffeur in situ seems able to be parked anywhere with complete immunity from harassment by Police or parking officers.  The Century looks bland in photos, but in reality, upon the Ginza pavement, a century is imposing, regal and stylish in an old school way.


Dark blue Toyota Century parked on Kerb, Ginza, Japan, under neon light.

A midnight blue Toyota Century, the build quality is incredible and the motor a V12.  If you have a chauffeur driven Century in Japan you have made it!


Red Nissan Hyper sports prototype on Nissan corner, Ginza, Japan.

Nissan Hyper Car concept prowling Ginza from behind glass on Nissan Corner.


Your ears will notice, or should that be, not notice something else.  For such a busy place the traffic seems remarkably quiet, no loud exhausts and definitely no horns, in our entire time there I only recall hearing a car horn on a couple of occasions.  Generally, cars are driven in a calm, sedate and orderly fashion, the complete opposite of the madness you might experience in say, Rome.

The streets of the Ginza and surrounding area are a combination of vast avenues and narrow thoroughfares, almost all are one way. The pavements are spotlessly clean, absent of buskers, beggars, pavement furniture, advertising boards and other physical impediments thus walking around is easy.

Don't cross against the lights, Japanese happily wait at red walk lights regardless of the traffic flow or non-flow and frown on those who disregard the signs. People move with purpose, but in an orderly fashion, there's no pushing and shoving, defintiely no talking loudly on phones, or aloud to one another. Good manners are pivotal, but that's true of Japan generally.


Tokyo plaza crossing at night in Ginza, Tokyo, Japan, multiple exposure, zebra crossing.

The Tokyo Plaza Crossing


orange based abstract image, streaks and lines, based on window display in Ginza Japan.

Abstract made from a  window display across the road from Nissan Corner


Regarding fashion, Ginza is conservative, the Japanese women do not flaunt sexuality but rather dress immaculately in beautiful materials all exquisitely cut and then tastefully trim with discrete jewellery. "Refinement" is a word that sums up the fashion style of Ginza ladies, whilst the men tend towards the universal black suit, shoes and white shirt, in other words, the typical business uniform one would expect to see in the financial districts of Manhatten.

Of course, Ginza is not all about shopping, there is much eating to be done as well.  From the food halls in the basements of the department stores, through to the myriad of speciality restaurants, there's an option for almost every palette, except perhaps for those looking for typical American style fast food.  KFC and McDonalds are present but much rarer than in other cities.

One constant however are coffee shops, there are Starbucks and equivalent style shops on every block, but I'd say for "Coffee Culture" loving Aussies like ourselves the coffee is generally a disappointment with the exception of a few specialist coffee shops.


  Tea with a gold strainer and a timer.
                                          
                                                  Tea with a gold strainer and a timer.


Ginza is close to many of the other Tokyo delights such as Imperial Palace and Gardens, the Fish Market, Tokyo Tower and a wealth of other tourist locales.  The metro system is highly efficient and cheap, placing you within striking distance of almost anything you could wish to see within around 30 mins or maybe less.  For Aussies used to the vagaries of Sydney trains and buses, forget everything you have ever experienced, Tokyo despite its massive 24 million population just works, "on time, every time"!


Ginza at night with yellow taxi and dusk sky.
                                                                 
                                                  Classic Ginza street at dusk.


Just to finish up on the technical side of things, the iPhone pics are mostly DNG captures, but there are some JPEGs shot on the standard app when it suited, and the multiple exposures were all JPEGs shot in Average Cam Pro. As always the DNG files were extracted in Lightroom Mobile (now known as Lightroom CC) and I have done a little fine tuning on Snapseed.

The Olympus pics were shot on my EM5 Mk2, with mainly the cheap Panasonic 14-42 series 2 or the super compact Panasonic 35-100 zoom using RAW.  You can check out my recent review of the latter lens here:

https://braddlesphotoblurb.blogspot.com.au/2017/10/the-perfect-m43-holiday-companion.html

The frames were done in Photoshop and in some cases, a few small selective edits were made whilst there.


East Gardens of the Imperial Palace, pond, autumn trees, sculpture and stones.Ginza, Japan.

A lovely spot in the East Gardens of the Imperial Palace, not far from Ginza.


Hibiyakoen, park, Tokyo, Japan, pond and manicured trees. looking down.

Hibiyakoen, a wonderful park and an easy walk from central Ginza.


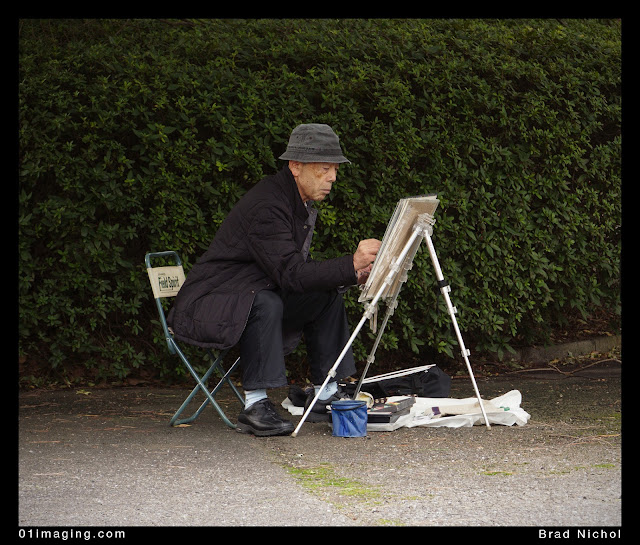
Painter in East garden imperial palace grounds, tokyo, japan, man with easel.

Painters are found all around the East Gardens


Man sitting upright on chair in east garden imperial palace grounds Tokyo Japan.

Taking time out in the East Gardens to contemplate the day.


Painter in East garden imperial palace grounds, tokyo, japan,woman with easel in red top.

The gardens offer serenity and a delight to the eyes.


Guard at front gates of imperial palace, tokyo, japan,

Guard at the Imperial Palace


Japanese man on bike in suit with phone in Japanese park, bag in basket, grey suit, bike has electric motor, tokyo, japan.

Business men commonly cycle, Tokyo is welcoming of cyclists, no helmet needed and you can ride on the footpath.


Would you like to learn how to shoot the ultimate RAW images on your iPhone, I have a new eBook on the iBooks store, "Ultimate iPhone DNG".  You will be amazed at just how much better your iPhone images can be, the book contains information not published anywhere else, it's easy to follow and will be of benefit to iPhone shooters at all levels.  Over 400 pages of iPhone RAW goodness and there are another 5 books in the series coming up with "Ultimate iPhone Composition" due for release before Christmas.  

Buy it on the iBooks Store, click on this link:

https://itunes.apple.com/us/book/ultimate-iphone-dng/id1274334884?ls=1&mt=11


Monday, 5 September 2016

Turn Your iPhone Into the Creamy DOFmeister!


Yep the pic above was taken with an iPhone, it is the flower of a red flowering eucalyptus variety and right about now it and many other species of native Australian trees are bursting into spring bloom.

And no, just in case you are wondering this is not the product of laborious application of a dodgy lens blur app and you don’t need any special accessory lenses or hardware, in fact you can probably achieve this result with items you likely already have.


iPhones rock, no doubt about it, for many it is the "go to" camera, maybe their only camera, every day some new app or feature seems to add to the enormous repertoire of performance options, in fact it is pretty incredible what can be achieved, and you can even make a phone call if you wish.

Of course we are all aware of the iPhones' limitations, it's hard to get any real separation of depth and the bokeh such as it is, is not what you would call super creamy, the sensor is prone to burning out highlights and any degree of overexposure can lead to nasty colour shifts in those highlights. Additionally the focal length whilst great for most snapshot needs tis a little on the wide side for macro work and portraits.

Now just to be straight, the method I am about to describe will not help with shots that lay outside the macro range but it certainly can help with your macro and close to macro shots and provide a look that is for all intents and purposes a little closer to what you may achieve using a camera with a much larger sensor, at least in terms of bokeh.


So here is what you will need to Bokehrise your Macro shots.

An iPhone, ideally a later model with the higher resolution sensor, but it will work fine with earlier models.

An iPad or equivalent Android tablet, preferably the larger versions, but the iPad mini will work too with a few more limitations, an iPad Pro would open up even greater and larger possibilities.

A mini tripod and the head of a selfie stick so you can mount your iPhone solidly to the mini tripod to get sharper results, ideally the tripod should have a ball-head to make it easier to get the phone in a precise position.

Some small directional LED lights, I use a few cheap helmet miners style lamps I picked up from Aldi for about $4.99 each, small LED desk-lamps and work-lamps could be used as well.

Snapseed loaded onto your iPad and iPhone or other device, this is free photo editing app.

A camera replacement app for you phone that gives full white balance, exposure and focus control, I strongly recommend ProCamera for i device users. It costs a few dollars but is well worth the price.


That's it, like I said most of it you have already and what you don’t have is free or cheap.


What are the advantages of Bokehrising


Way better looking depth of field effects and bokeh

The option to better control the tonality of the background and avoid the bleachy burnies.

Much greater control over subject lighting.

Vastly reduced likelihood of subject movement

Consistent ability to stick with lower or lowest ISO setting and liberate a higher quality result.

A degree of background perspective control.


So what are we going to do?


Ok in short it goes like this, you take a photo of your background completely out of focus, you then load it onto your iPad, open up the file and use it as the background for your actual subject and shoot away. There is no fancy post capture editing needed and the results, well you can judge that from the pics in this article.


Why it works

There are a few things in play here that come together to give this reasonably unique look.

First smart phones have round apertures, so the out of focus areas whilst not normally being creamy smooth don't have odd shaped blur points, thus the devices can, if treated appropriately, produce some reasonably nice bokeh results.

Separating the main subject capture from the background capture radically improves your control over the highlight rendering, which for many shots can be extremely harsh, giving that classic small sensor tonality.

By capturing the background separately you are able to use the cameras zoom function to give a more Telephoto perspective which helps removes distractions, after all we are not looking for detail and if needed you can even blur the backgrounds image noise away without effecting the clarity of your final subject.

Providing you have a reasonable working distance between the subject and the screen the pixels of the screen will not be seen.

We actually get three bites at blur creation, in the original capture, which can be blurrier than normal seen as it is just the background you are capturing, by further blurring the background in editing prior to the final capture and finally by having the additional distance between the subject and the screen, ultimately the sum total is complete blur control.

Treating the background and foreground separately means you have superior colour/white balance control interns of striking a balance between the artificial light sources illuminating your macro subject and the natural light on the background at the time of capture.

Often one of the biggest challenges in macro photography is subject movement and positioning, this way we are able to capture the subject in a fully controlled situation neatly eliminating the issues.

Of course there is a bit more to it if you want good or great results so lets get down to tin tacks and explore how to go about this in detail.


Part A) Background Capture

Choose something that is in keeping with the subject, in the case of the flower shots shown here I chose the actual plants that the flowers came off. Be very careful to avoid the highlights in the background bleaching out, which means you will need to control the exposure tightly. Also ensure that you have a correct white balance rendering, hence the need for an app that gives full WB control like that available in ProCamera.


The most important thing is to ensure your background is fully "out of focus", again you need something like ProCamera to do this, though there are workarounds with the standard camera app if you really want to save those extra dollars.

Ensure the ISO is set as low as possible, which should be easy as it is likely the exposure compensation will be dialled back by about 1 to 2 stops anyway. Basically we want to limit noise so your background looks smoother without additional editing. 

Take several versions of your background as it can be a little hard to pre-judge exactly what will look best.


Part B) Optional Background Edit

Edit you background in Snapseed making sure to keep the tonal range in check, in other words go for a slightly lower contrast rendering without clipped highlights, also fine tune the colour if needed and slightly tone down the saturation, this helps to increase separation the final image and gives a more natural rendering.


If you want even greater subject separation you can apply the radial or linear blur filters within Snapseed.

You can apply a vignette to the background if you want to add a little extra impact, the advantage in doing this at this now rather than later is your actual subject will not be vignetted which again will help it stand out better.

You can obtain a subtle but important perspective change by using the transform tool in Snapseed to adjust your background.


Part C) The Subject Capture

Support your iPad so it sits up nice and straight, I find that a couple large books work well.


Make sure you don't have any random refections on the screen, be careful here as they are easy to miss and this is by far the most challenging aspect of the whole process.  I ideally work in a darkened room/environment (remember the artificial lights are going to provide the subject illumination) and make sure you wear dark clothing so the colours don't bounce of your screen.

Set your iPhone up on the mini pod.

Place your subject in front of the iPad, usually around 10cm or so but this will be subject dependent. It can be tricky to find ways to set up your subject so it might require a little creativity on your part, I find clothes pegs, plastic clamps, florists foam etc are all handy items to have at hand. Be careful not to go too close as the pixels may actually show up and in a worst case scenario get aliased by the blur from the camera which looks really crook.

Open up your background pic and adjust the brightness on your iPad screen so it fits in well with your subject, generally about half strength works fine.

Adjust the size of your background image by zooming in and out, this will give a different perspective look to your final image.

Open ProCamera and make a custom white balance using your lights to illuminate a white card or piece of paper, aim the card at an angle half way between your lights and the iPhone.

Set the focus precisely to where you want it, allow for the fact that depth of field will distributed about 50% in front and behind the point of focus when focused this close.(use the manual focus option)

Fine tune your framing and in this case use the cameras zoom function, yes normally I would not recommend it but in this case it works fine, we are only going to zoom to about 1.3 times (And that is why I suggested you are better off with the later model iPhones), you will still be left with adequate resolution for most regular needs.

Adjust the exposure compensation (with your lights in place and turned on of course) 

Use the self timer function to trigger the camera.


Part D) (optional) Final Edit

You can edit to taste in Snapseed if you wish, I suggest that you might consider the following items.

Cropping to remove any stray bits of the iPad showing and improving the composition

Fine tuning the sharpness

Mild vignetting around the corners

Selective edits to control highlights or shadows

Cloning out annoying defects that often appear in macro shots due to magnification like dust spots and stray hairs and maybe the odd reflection if you weren't careful enough.

Adding a frame


Really the editing is up to you, generally I have never created an image that didn’t benefit from at least a little editing but you choose what to do, I must add that I find some of the film simulation effects in Snapseed work really nicely with this type of imaging and the samples have had some subtle simulations applied complete with a bit of grain.


A few tips to help

You can throw the background even further out of focus when shooting if you hold a plus 4 diopter macro filter in front of the camera when you take the shot, with the focus locked at its closest setting, you may also choose to have some foreground elements almost in focus.

If the colour of the background and subject are at odds, then edit the colour balance of the background in Snapseed to get a better look before you start shooting the final shots.

If you shoot the background a little wide you can adjust the proportional size of the background elements by zooming it in or out on the tablet when you take the shots.

You can improve the look of your lighting in the final shot by using a white paper or card to bounce the light, diffusing it through shower curtain material etc. Paying extra attention to the lighting will pay dividends, just make sure you don't get reflections on the screen.

Try to make sure the direction of your lighting on your subject is the same as the lighting in your background, otherwise it will look quite odd.

If you have a computer monitor with a large retina type display you could use that for your backgrounds to enable you to shoot much larger objects, although I have not included samples taken this way in this article I have done so and can confidently confirm a 27 inch Mac retina screen rocks big time for this method, allowing you to shoot much larger subjects with ease.

This is a technique that really benefits from a bit of forward planning, especially in relation to your backgrounds.


Finally there is nothing to stop you going the full monty and creating completely abstract background effects in Photoshop or something similar and using these behind you subject, have some fun, who knows what you might come up with.


Advanced Options

You could use an app like Hydra to increase the resolution of the final subject capture, though this will preclude much of the finer colour control offered in ProCamera. The main advantage is that it will allow you to zoom in closer for a much tighter perspective when capturing the final image.

You could use HDR capture methods to increase the dynamic range of your background or even subject capture.

You could use image/focus stacking via an app like Stay Focused to optimise the depth of field of the subject capture.


Why would you use it this technique

You just like to do fun stuff with your iPhone

You only have a smartphone

You need a quick and easy option for product pics for the web or small print options

You need a combination of deep depth of field on the subject coupled with shallow Depth of Field on the background

You rather like the flexibility and unique rendering the method offers


So there you have it, I reckon the results are really rather nice and definitely worth the effort, I would love to hear how you go, happy Bokehrising.


Wednesday, 24 August 2016

An iPhone in Macau

A few months back my wife and I visited Macau, it's a rather interesting place being an old Portuguese port.  Today a great proportion of the original Portuguese architecture remains, but mixed into the environment are modern casinos and hotels, some of them with very unusual architectural features.

On this trip I decided to use my iPhone as the sole capture device, we were walking everywhere and covering a lot of ground each day and in any case sometimes I just like to limit myself gear wise and concentrate on the composition.

I was pretty happy with the results which were all processed in Snapseed on the iPhone and tuned up with some of the apps built in film simulation options.  The shots ranged from straight people style street to architecture and abstract.

I decide to post a few of the architecture shots here today.

Our long term plan is to run some photo tours to Macau and Hong Kong and we have a friend there who is a fabulous tour guide so it will be a shared effort, he will provide the background info and shepherd the group around and I will keep the group shooting efficiently and creatively.

I will keep you posted on that, we are looking at late 2017 to kick that trip off.


Lisboa Casino...classic!


Rear entrance of the Lisboa


They have done amazing things with glass and mirrors inside the Lisboa


One of the many older government buildings with a backdrop of rather odd apartment buildings.


Abandoned green home,  a real fixer upper.


There are many temples and places of worship scattered around Macau.